Set or change your Company Profile on Invoicera
The process of setting an Invoice with Invoicera starts once you create your account (signup) with information, in the first user journey with Invoicera. You can Set or change your Company Profile from the My Accounts section on settings.
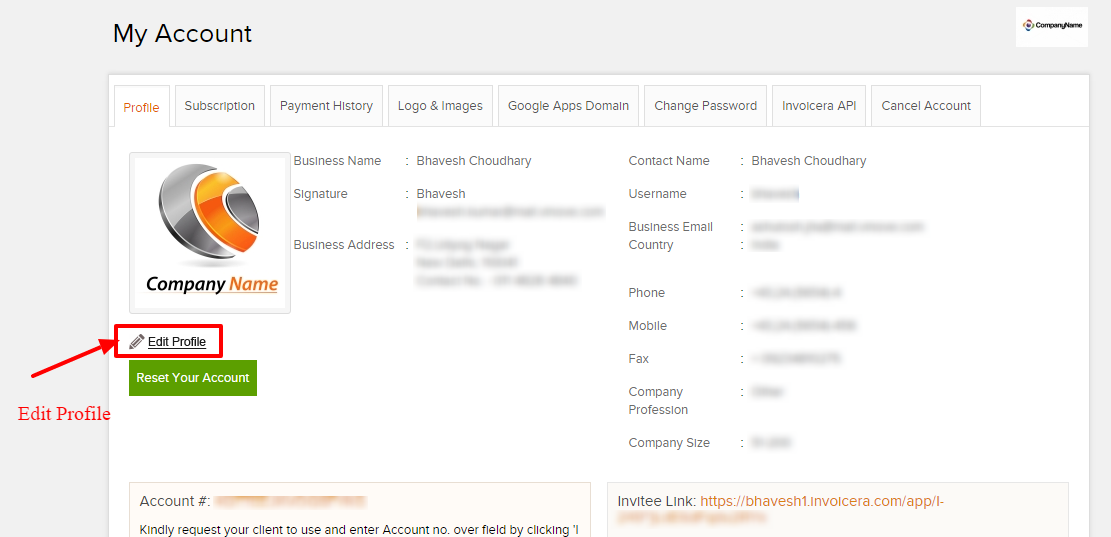
For setting up your Company Profile, please Click Settings->My Account->Profile Tab.
Step 1: There would be a hyperlink as “Edit Profile” click and you will be able to see the following screen.
Step 2: Now you will be redirected to edit profile page of Invoicera. From here, you can update your business information and manage your corporate profile.
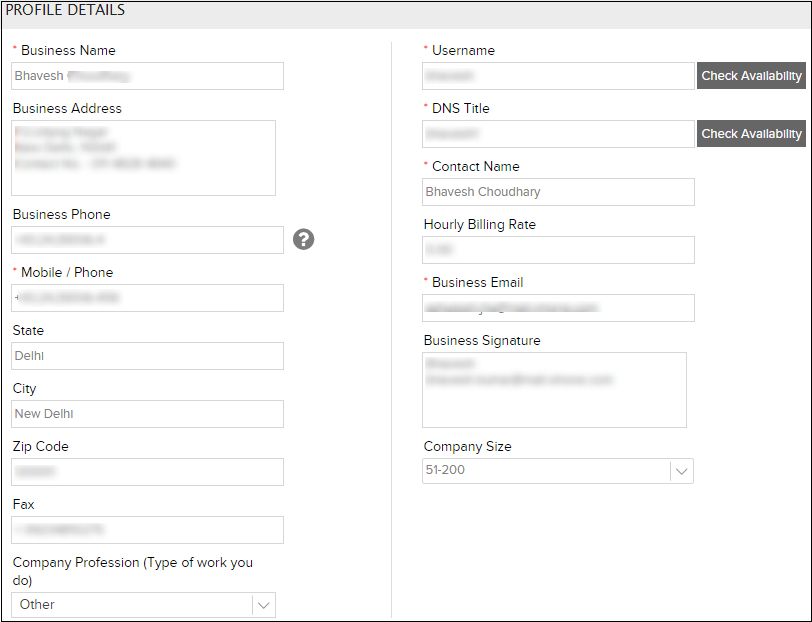
Step 3: Now you can update/add details for all the required fields. Following explanation will give you clues as to what type of details are to be entered.
1. Business Name: This is the name of the Business OR the Company, that is displayed on invoices and in emails to your clients.
2. Business Address and Business Phone: The Business Address and Phone Number will be shown on the Invoices that you send through Invoicera.
3. Username: The username is used to login to your Invoicera account as a part of secure and personal information. You can change/update the username – when required.
4. Business Email: This is a required field. The email address entered here is what your clients will see as the “reply address” from Invoicera emails. Once you choose to change email id, you would need to logout and login again to see the change taking place.
5. DNS Title: This is the URL that you have registered for your Invoicera account. Your clients, your staff, and you can log in to your Invoicera account with their own unique login credentials. This URL can be changed easily.
6. Company Profession: Only B2B users (Those who have linked your business account to their account) will be able to see the Company Profession.
7. Contact Name: You can update your company administrator name from Contact Name field.
8. Hourly Rate: In case you use Invoicera Project, Integrated Time tracking solution with billing. You can add your billing rate from here.
9. Business Signature: You can add your business signatures to your profile from here. These signatures will be sent in your email templates – that you wish to communicate with your clients/staff.
After entering details, click “Save” to save changes on your account. Hope this article has helped you understanding on how to set or change your Company Profile on Invoicera.
In case the article was not able to help you with your queries, please click here to raise a support ticket to our Customer Delight Team.
Posted by Invoicera Support on 14 December 2015
Was This Article Helpful?
Related Posts